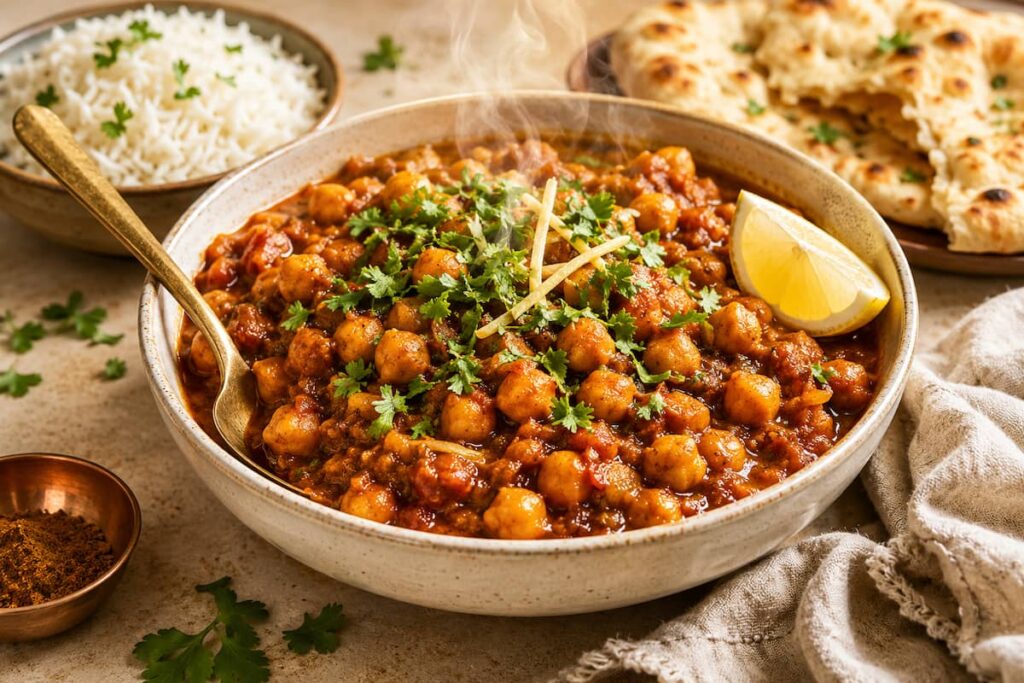
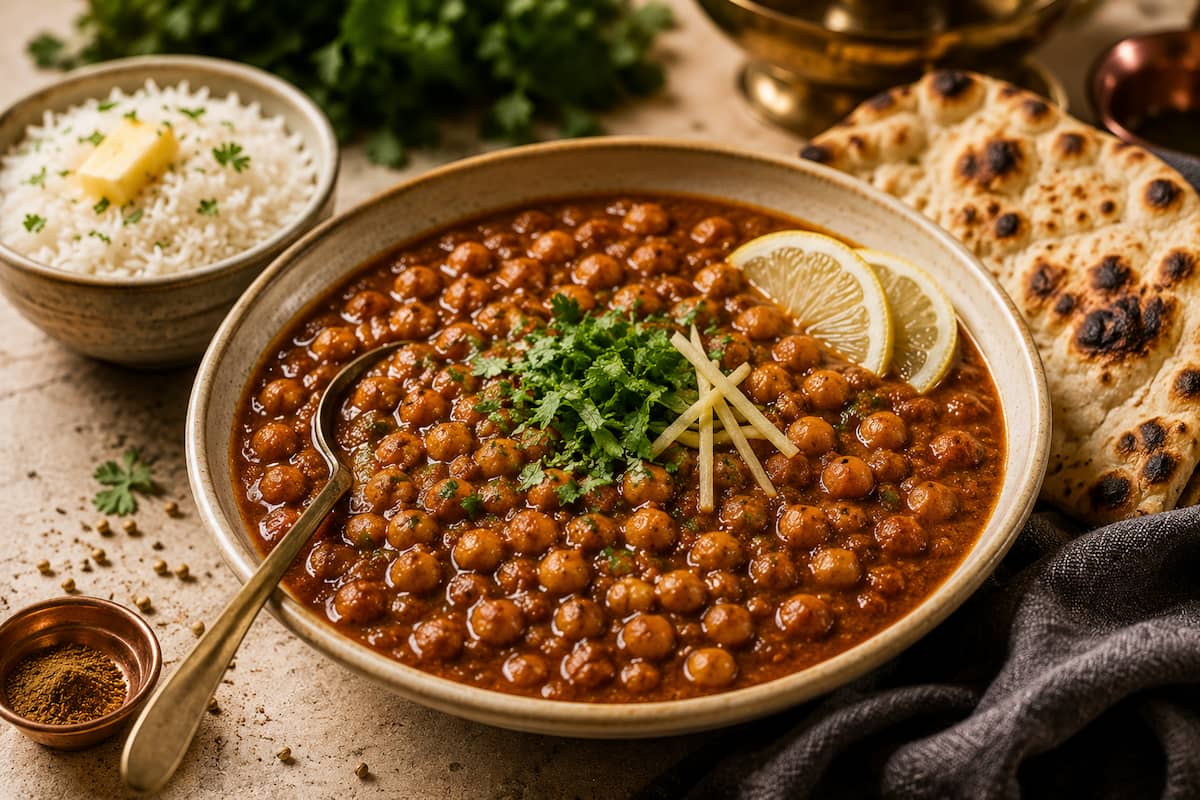
Instant Pot Chana Masala (Punjabi Chickpea Curry)
After testing several versions of this Instant Pot Chana Masala, I found that a single adjustment changed everything: the liquid ratio. My first trial used nearly 2 cups (475 ml) of liquid for 3 cups (510 g) of cooked chickpeas. The curry tasted pleasant, but the gravy remained too thin and lacked the rich, clinging texture that defines a proper Punjabi chole. A second trial reduced the liquid but rushed the onion browning stage — the curry looked appealing, yet tasted flat. The final version uses 1¼ cups (300 ml) of liquid, thoroughly browned onions, a well-reduced tomato masala, and a full 10-minute natural pressure release. The result is a hearty, restaurant-style chickpea curry that tastes as though it simmered for hours.
Last updated: 13 June 2026
For home cooks in the United States and United Kingdom, this recipe offers an accessible path to authentic Punjabi flavor using ingredients available in most major supermarkets. Garam masala, cumin seeds, coriander powder, and turmeric are standard pantry items. The optional Kashmiri chili powder can be replaced with paprika and a small pinch of cayenne, making this recipe fully achievable without a specialist grocery trip.
Why This Recipe Works
- Pressure cooking infuses spices deeply. The aromatic tomato-onion masala penetrates the chickpeas far more effectively under pressure than stovetop simmering allows.
- Properly browned onions create irreplaceable depth. Caramelised onions contribute a natural sweetness and layered savory complexity that shortcuts cannot replicate.
- The gravy thickens without additives. Lightly mashing a portion of the chickpeas into the sauce creates body and a silky texture without flour, cornstarch, or cream.
- Every ingredient is supermarket-accessible. US and UK readers can source all core ingredients at a standard grocery store. Substitutions are clearly noted for any specialty items.
- The flavor improves with time. Like most spiced legume dishes, this chana masala is often better the following day, making it an ideal meal-prep recipe.
- Naturally vegan and gluten-free. No modifications are needed — the dish is suitable for plant-based and gluten-sensitive diets as written.
Equipment You Will Need
- 6-quart Instant Pot (or any 6-quart or larger electric pressure cooker)
- Wooden spoon or silicone spatula — for sautéing and deglazing
- Fine grater or Microplane — for grating the ginger
- Sharp knife and cutting board — for dicing onions and chopping tomatoes
- Measuring cups and spoons — for accurate liquid measurement
- Ladle — for serving
Ingredient Notes
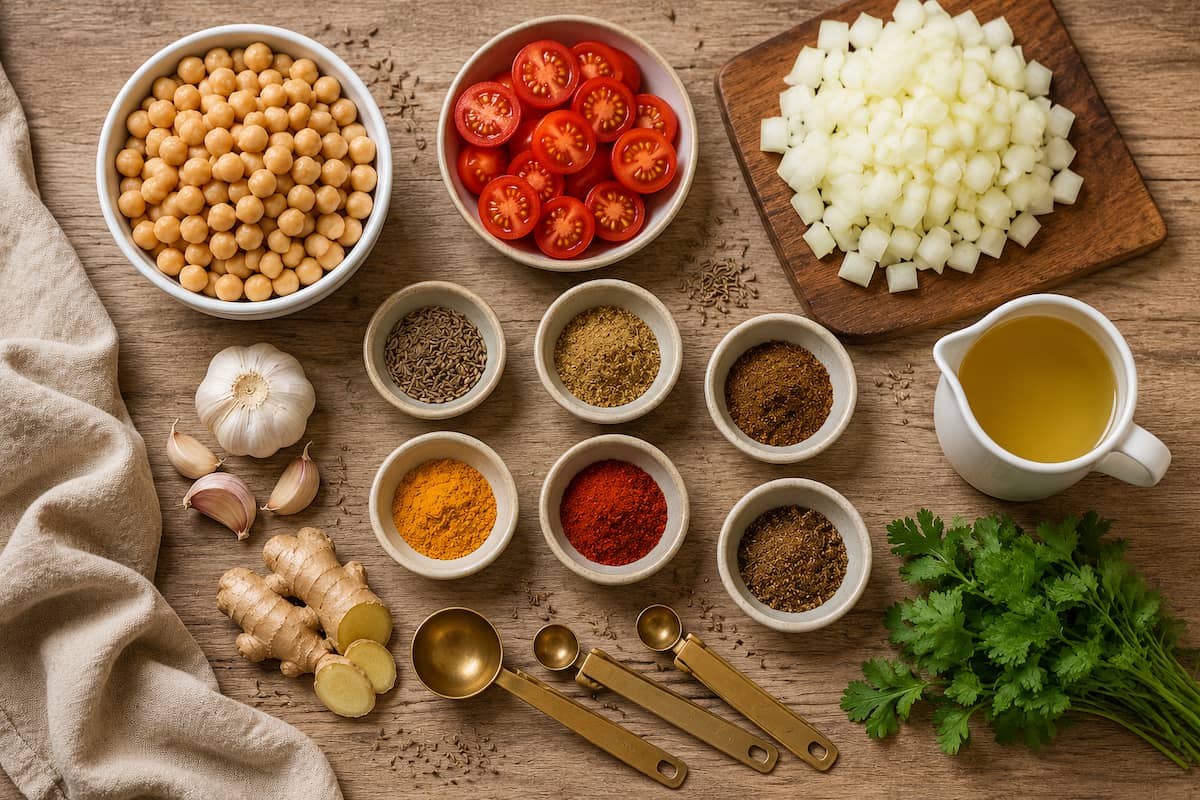
Cooked Chickpeas — 510 g (3 cups)
Chickpeas are the foundation of this dish. They provide substantial plant protein, dietary fiber, and a satisfying texture that makes chana masala filling enough to serve as a main course. Canned chickpeas are convenient and work excellently in this recipe. If you enjoy building protein-rich vegetarian meals, our High Protein Indian Meal with Paneer, Dal and Quinoa uses a similar approach to combining multiple plant-based protein sources in a single balanced plate.
Neutral Oil — 30 ml (2 tablespoons)
Sunflower oil, vegetable oil, canola oil, or avocado oil all work well. The oil carries heat evenly during the onion browning stage.
Yellow Onion — 200 g (1 large onion)
Yellow or brown onions provide the sweetness and depth that form the core of any Punjabi curry. Do not substitute with red onion or white onion — the flavor profile differs enough to affect the final result.
Tomatoes — 300 g (2 medium tomatoes)
Fresh, ripe tomatoes produce the best result. Good-quality canned crushed tomatoes are an acceptable substitute when fresh tomatoes are out of season or unavailable.
Garlic — 12 g (4 cloves)
Fresh garlic delivers significantly more flavor than pre-minced garlic from a jar. Mince finely for even distribution through the masala.
Fresh Ginger — 15 g (1 tablespoon grated)
Ginger provides brightness and warmth that balances the richness of the tomato-onion base. Peel and grate on a fine grater or Microplane for the best texture.
Cumin Seeds — 5 g (1 teaspoon)
Whole cumin seeds bloomed in hot oil release a warm, nutty aroma that forms the first aromatic layer of the dish. Do not substitute ground cumin here — the texture and fragrance of whole seeds are different.
Ground Coriander — 6 g (2 teaspoons)
Ground coriander provides mild citrus notes and gentle earthiness. It is available in the spice aisle of virtually every US and UK supermarket.
Ground Cumin — 3 g (1 teaspoon)
Reinforces the warmth of the whole cumin seeds and adds depth to the gravy.
Ground Turmeric — 2 g (½ teaspoon)
Contributes the characteristic golden color and a subtle, slightly bitter earthiness.
Kashmiri Chili Powder — 2 g (½ teaspoon)
Provides gentle heat and a beautiful deep-red color without excessive spice. If unavailable at your local supermarket, substitute sweet paprika with a small pinch of cayenne pepper for both color and heat.
Garam Masala — 4 g (1 teaspoon)
This warming spice blend is added at the very end of cooking to preserve its aromatic volatiles. Adding it too early causes the delicate notes to dissipate during pressure cooking.
Vegetable Stock or Water — 300 ml (1¼ cups)
Vegetable stock adds extra savory depth. Water works perfectly well if stock is unavailable. Avoid using chicken or beef stock as this is a vegetarian recipe.
Fresh Cilantro — 15 g (¼ cup chopped)
Used as both a garnish and a finishing herb. Stir half into the curry and scatter the remainder over the top when serving for maximum freshness.
Optional: Kasuri Methi (Dried Fenugreek Leaves)
A pinch of kasuri methi stirred in at the end contributes a subtly bitter, slightly sweet flavor that many restaurant versions of chana masala include. Available at South Asian grocery stores and online retailers in the US and UK.
Optional: Fresh Lemon Juice
A small squeeze of fresh lemon juice brightens the entire dish just before serving and balances the richness of the gravy.
Step-by-Step Instructions
- Heat the oil. Select the Sauté function on the Instant Pot. Add the oil and allow it to heat for approximately one minute. A small drop of water should sizzle immediately when the oil is ready.
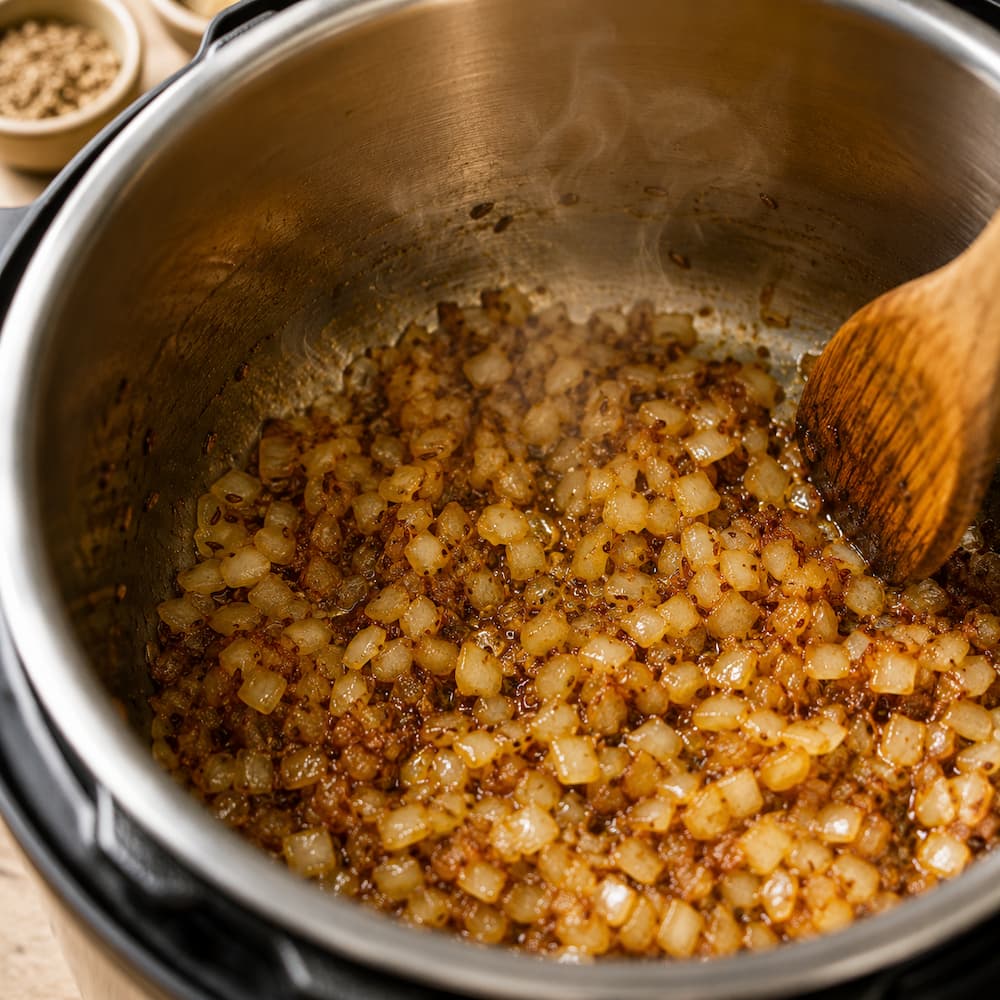
- Bloom the cumin seeds. Add the whole cumin seeds to the hot oil. Cook for 20 to 30 seconds, stirring constantly, until they turn a shade darker and release a warm, nutty fragrance. Listen for the gentle sizzling — that sound tells you the seeds are blooming properly.
- Brown the onions. Add the finely diced onion. Cook for 8 to 10 minutes, stirring every minute or two, until the onions are deep golden brown. They should have reduced significantly in volume and developed visible caramelization. If the Instant Pot is too hot and the onions are darkening too quickly, add a splash of water to deglaze and continue cooking. This stage cannot be rushed — it is the single most important step for building flavor.
- Add ginger and garlic. Stir in the grated ginger and minced garlic. Cook for approximately one minute, stirring continuously, until fragrant.
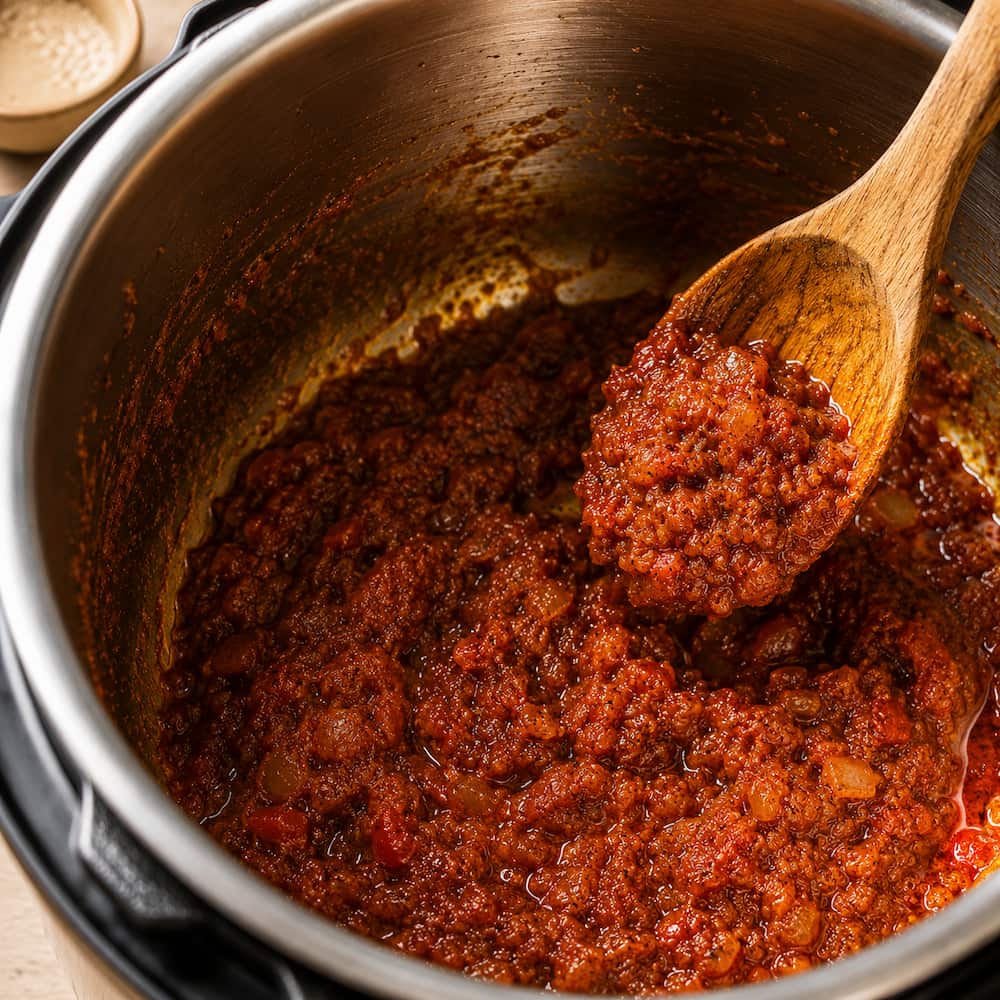
- Build the masala base. Add the chopped tomatoes, ground coriander, ground cumin, turmeric, and chili powder. Stir thoroughly to combine all ingredients.
- Reduce the masala. Continue cooking for 5 to 7 minutes, stirring frequently, until the tomatoes have completely broken down and the mixture appears thick and concentrated rather than watery. The masala should pull away slightly from the sides of the pot. This reduction concentrates the flavors before pressure cooking begins.
- Add the chickpeas. Stir the cooked chickpeas into the masala, ensuring each chickpea is evenly coated with the spice mixture.
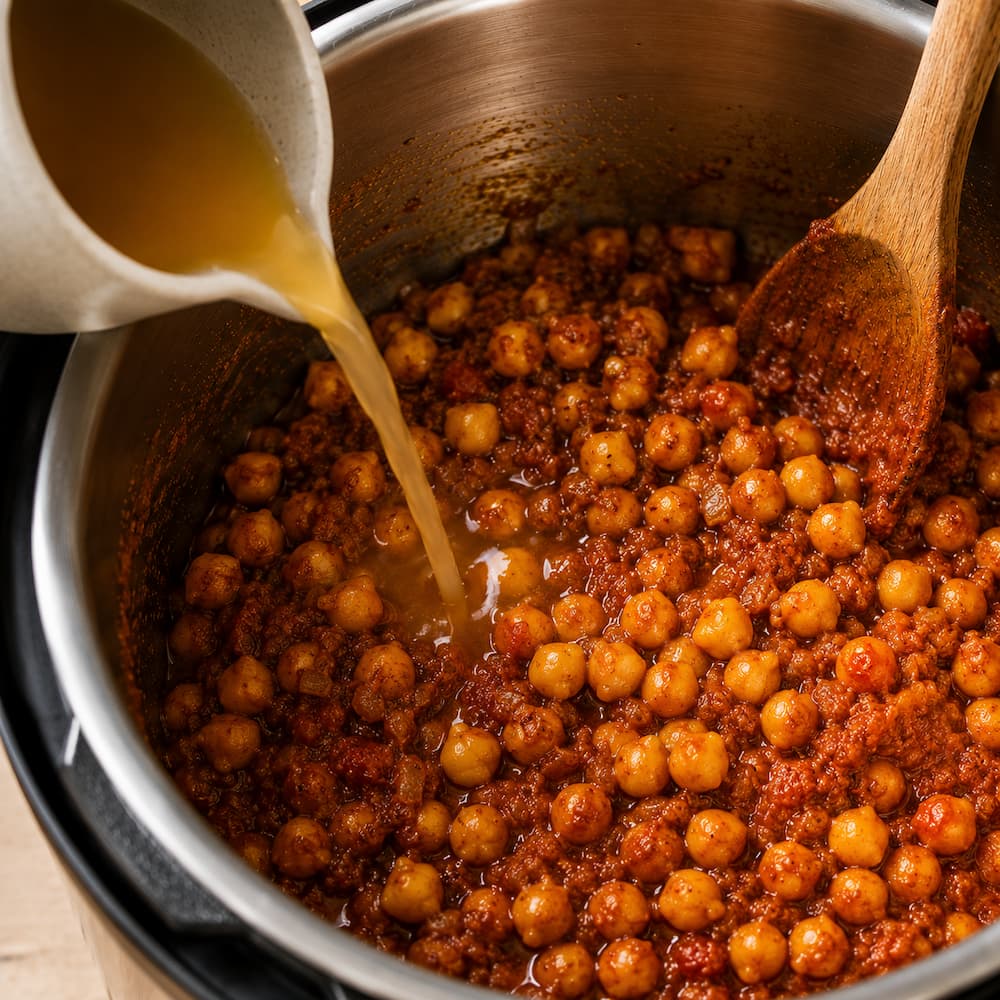
- Add liquid and deglaze. Pour in the vegetable stock or water. Using a wooden spoon, scrape the bottom of the pot thoroughly to lift any browned bits. This deglazing step is essential — any residue left on the base can trigger the Instant Pot’s burn warning during pressure cooking.
- Pressure cook. Secure the lid and ensure the pressure valve is set to the Sealing position. Select High Pressure and set the timer for 15 minutes. The Instant Pot will take approximately 10 minutes to come to pressure before the 15-minute cook time begins.
- Natural pressure release. Once the cook cycle is complete, do not touch the pressure valve. Allow the pressure to release naturally for 10 minutes. After 10 minutes, carefully turn the valve to Venting to release any remaining pressure.
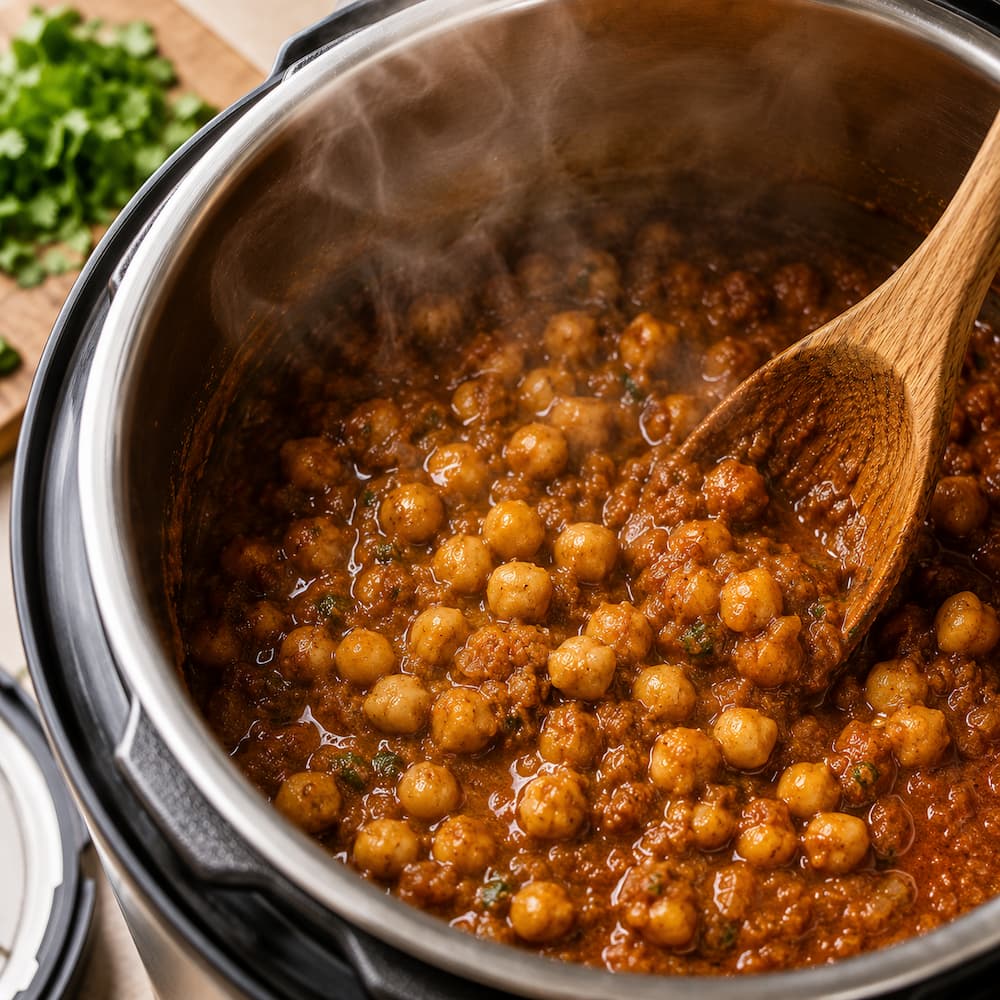
- Check the consistency. Open the lid and stir the curry. The gravy should appear rich and moderately thick. If it seems thinner than expected, continue to the next step.
- Mash a portion of the chickpeas. Using the back of a wooden spoon or a potato masher, gently press down on approximately one-quarter of the chickpeas directly in the pot. This mashing releases starch into the sauce and thickens the gravy naturally without any additional thickener.
- Add garam masala. Sprinkle the garam masala over the curry and stir well to distribute evenly through the sauce.
- Finish with cilantro. Stir in the chopped fresh cilantro.
- Rest before serving. Allow the curry to rest for 5 minutes with the lid off before serving. This brief resting period allows the sauce to thicken slightly further and the flavors to settle and meld together.
Common Mistakes to Avoid
- Rushing the onion browning stage. Undercooked onions produce a flat, noticeably less complex curry. Proper browning cannot be compensated for by adding more spice later. Invest the full 8 to 10 minutes here.
- Using too much liquid. Excess liquid dilutes the spices and produces a thin, soup-like consistency instead of a properly coated, restaurant-style gravy. Measure carefully and start with 300 ml (1¼ cups).
- Adding garam masala before pressure cooking. The delicate aromatic spices in garam masala break down significantly during prolonged heat. Always add it after the pressure cycle is complete.
- Skipping the deglazing step. Bits of tomato or onion stuck to the bottom of the Instant Pot will consistently trigger a burn warning mid-cycle. After adding the liquid, scrape every inch of the base before sealing the lid.
- Serving immediately out of the pot. Resting the curry for 5 minutes allows the gravy to thicken naturally and the flavors to develop further. The difference between a curry served immediately and one rested briefly is noticeable.
- Using old or stale spices. Ground spices stored for more than 12 months lose a significant portion of their potency and aroma. This recipe relies on the freshness of the spice blend for its character. If your spices are old, replace them before making this dish.
- Under-seasoning. Chickpeas absorb salt readily. Always taste the finished curry before serving and adjust seasoning as needed.
Variations
Spinach Chana Masala
Stir 120 g (4 cups loosely packed) baby spinach into the finished curry after opening the lid. Cook using the Sauté function for 2 to 3 minutes until the spinach is fully wilted. This variation adds color, nutrients, and extra volume.
Kala Chana Masala (Black Chickpea Version)
Replace standard chickpeas with kala chana (black chickpeas). The texture is firmer, the flavor slightly earthier and nuttier. If using dried kala chana, soak overnight and increase the pressure-cooking time by 5 minutes.
Extra-Spicy Punjabi Chole
Add one finely chopped green chili alongside the garlic and ginger. Increase the chili powder to 4 g (1 teaspoon) and finish with an additional pinch of cayenne for a restaurant-level heat.
Creamy Coconut Chana Masala
Stir in 120 ml (½ cup) full-fat coconut milk after opening the lid. Cook for 2 minutes on Sauté until the sauce thickens slightly. This version is milder, slightly sweeter, and particularly popular with younger eaters.
Vegetable-Packed Chana Masala
Add 150 g diced cauliflower florets, 100 g diced carrots, or 80 g frozen peas before sealing the lid for pressure cooking. These additions absorb the masala flavors and create a more substantial one-pot meal.
Lemon Chana Masala
Finish with the juice of half a lemon (approximately 15 ml / 1 tablespoon) just before serving. This brightens the flavor profile considerably and works particularly well in warmer months when a lighter, fresher curry is preferred.
Serving Suggestions
Instant Pot Chana Masala works as a weeknight dinner, a meal-prep staple, or a centerpiece for a larger Indian-inspired spread.
- Steamed basmati rice — the classic and most traditional pairing
- Jeera rice (cumin-tempered basmati rice)
- Whole wheat roti or paratha
- Naan bread — for a richer, restaurant-style experience
- Cucumber raita — to cool the palate between bites
- Kachumber salad (diced tomato, cucumber, and onion with lemon juice)
- Simple steamed vegetables alongside basmati rice for a lighter plate
For a complete Indian dinner spread that offers both a vegetarian and a non-vegetarian option, pair this curry with Butter Chicken From Scratch. The combination of a silky chicken curry and a hearty chickpea curry provides variety for mixed-diet households and makes for an impressive weekend meal. For a full Indian biryani feast, Ambur Dum Biryani makes an equally celebratory companion dish.
For meal-prep purposes, divide the finished curry into individual containers alongside basmati rice or quinoa. Chana masala is one of the most freezer-friendly curries available — the chickpeas maintain their structure beautifully through a freeze-thaw cycle, making it an ideal component for a structured weekly meal plan. See our 7-Day Indian Weight Loss Diet Plan for complete daily guidance on incorporating this dish into a balanced, calorie-conscious routine.
Storage and Make-Ahead
Refrigerator: Store cooled chana masala in an airtight container for up to 4 days. Reheat gently on the stovetop over medium-low heat or in a microwave until piping hot throughout.
Freezer: Freeze in portion-sized airtight containers for up to 3 months. The curry freezes exceptionally well — the chickpeas maintain their structure and the gravy thaws smoothly.
Thawing: Transfer frozen curry to the refrigerator the night before serving and thaw overnight. Do not microwave from frozen as the texture can become uneven.
Make-Ahead note: This curry is an excellent make-ahead dish. Prepare it the evening before a dinner party or Sunday meal prep and refrigerate overnight. The following day, the spices will have deepened and the gravy will have thickened further — many people prefer the day-two version considerably over the freshly made one.
Nutrition Notes
Chickpeas are a naturally protein-rich and fiber-dense legume, making this dish satisfying and filling as a main course. A single serving provides a meaningful contribution toward daily protein and fiber targets, particularly valuable in plant-based meal planning. Because ingredient brands, serving sizes, and optional additions vary across households, exact nutritional values per serving are not provided here. A precise calculation can be obtained using USDA FoodData Central or Cronometer with your specific ingredient quantities and portion size.
This recipe is naturally vegetarian, vegan, dairy-free, and suitable for most plant-based and gluten-free diets as written. If you are looking to balance this dish within a broader Indian meal plan, our Healthy Indian Dinner Recipes for Weight Loss guide covers how to combine Indian curries, grains, and vegetables for nutritionally complete meals.
Frequently Asked Questions
Can I use canned chickpeas for Instant Pot Chana Masala?
Yes — canned chickpeas work very well in this recipe and reduce preparation time significantly. Drain and rinse them before adding to the masala. The pressure-cooking time remains the same.
Can I use dried chickpeas instead of cooked?
Yes. Soak dried chickpeas in cold water for a minimum of 8 hours before cooking. Increase the pressure-cooking time to 35 to 40 minutes on High Pressure. The flavor can be slightly more complex than canned, but the timing is considerably longer.
Why is my chana masala too watery?
The two most common causes are using more liquid than the recipe specifies, or serving the curry immediately without allowing it to rest and thicken. If the gravy is too thin after cooking, select Sauté mode and simmer uncovered for 3 to 5 minutes, stirring frequently, until the desired consistency is reached.
Can I freeze this chana masala?
Yes — it freezes exceptionally well for up to 3 months. Chickpeas are one of the most freezer-friendly legumes as they retain their texture well through a freeze-thaw cycle.
Is Instant Pot Chana Masala spicy?
As written, the recipe is moderately mild — warm and aromatic rather than hot. Reduce the Kashmiri chili powder to ¼ teaspoon for a very mild version, or increase to 1 teaspoon and add a fresh green chili for a genuinely spicy result.
What is the difference between chana masala and chole?
Chole is the Punjabi term for this dish and is used most commonly in North India. Chana masala is the broader, more widely recognised name used across India and internationally. The recipes are essentially identical, though some regional chole versions include dried pomegranate powder or black tea for extra depth of color and slight tartness.
Can I make this recipe oil-free?
Yes, though the flavor will be noticeably different. Replace the oil with 3 to 4 tablespoons of water for sautéing. The onions will not brown as deeply, which affects the complexity of the finished curry, but the recipe remains fully functional.
Can I prepare this curry the day before serving?
Absolutely. In fact, making it a day ahead is recommended when time allows. The spices continue to develop and deepen overnight, and the gravy thickens further in the refrigerator.
Related Recipes
Healthy Indian Dinner Recipes for Weight Loss
7-Day Indian Weight Loss Diet Plan
High Protein Indian Meal with Paneer, Dal and Quinoa
Subscribe to the GrowRain newsletter for new recipes, kitchen tips, and food safety insights delivered directly to your inbox.